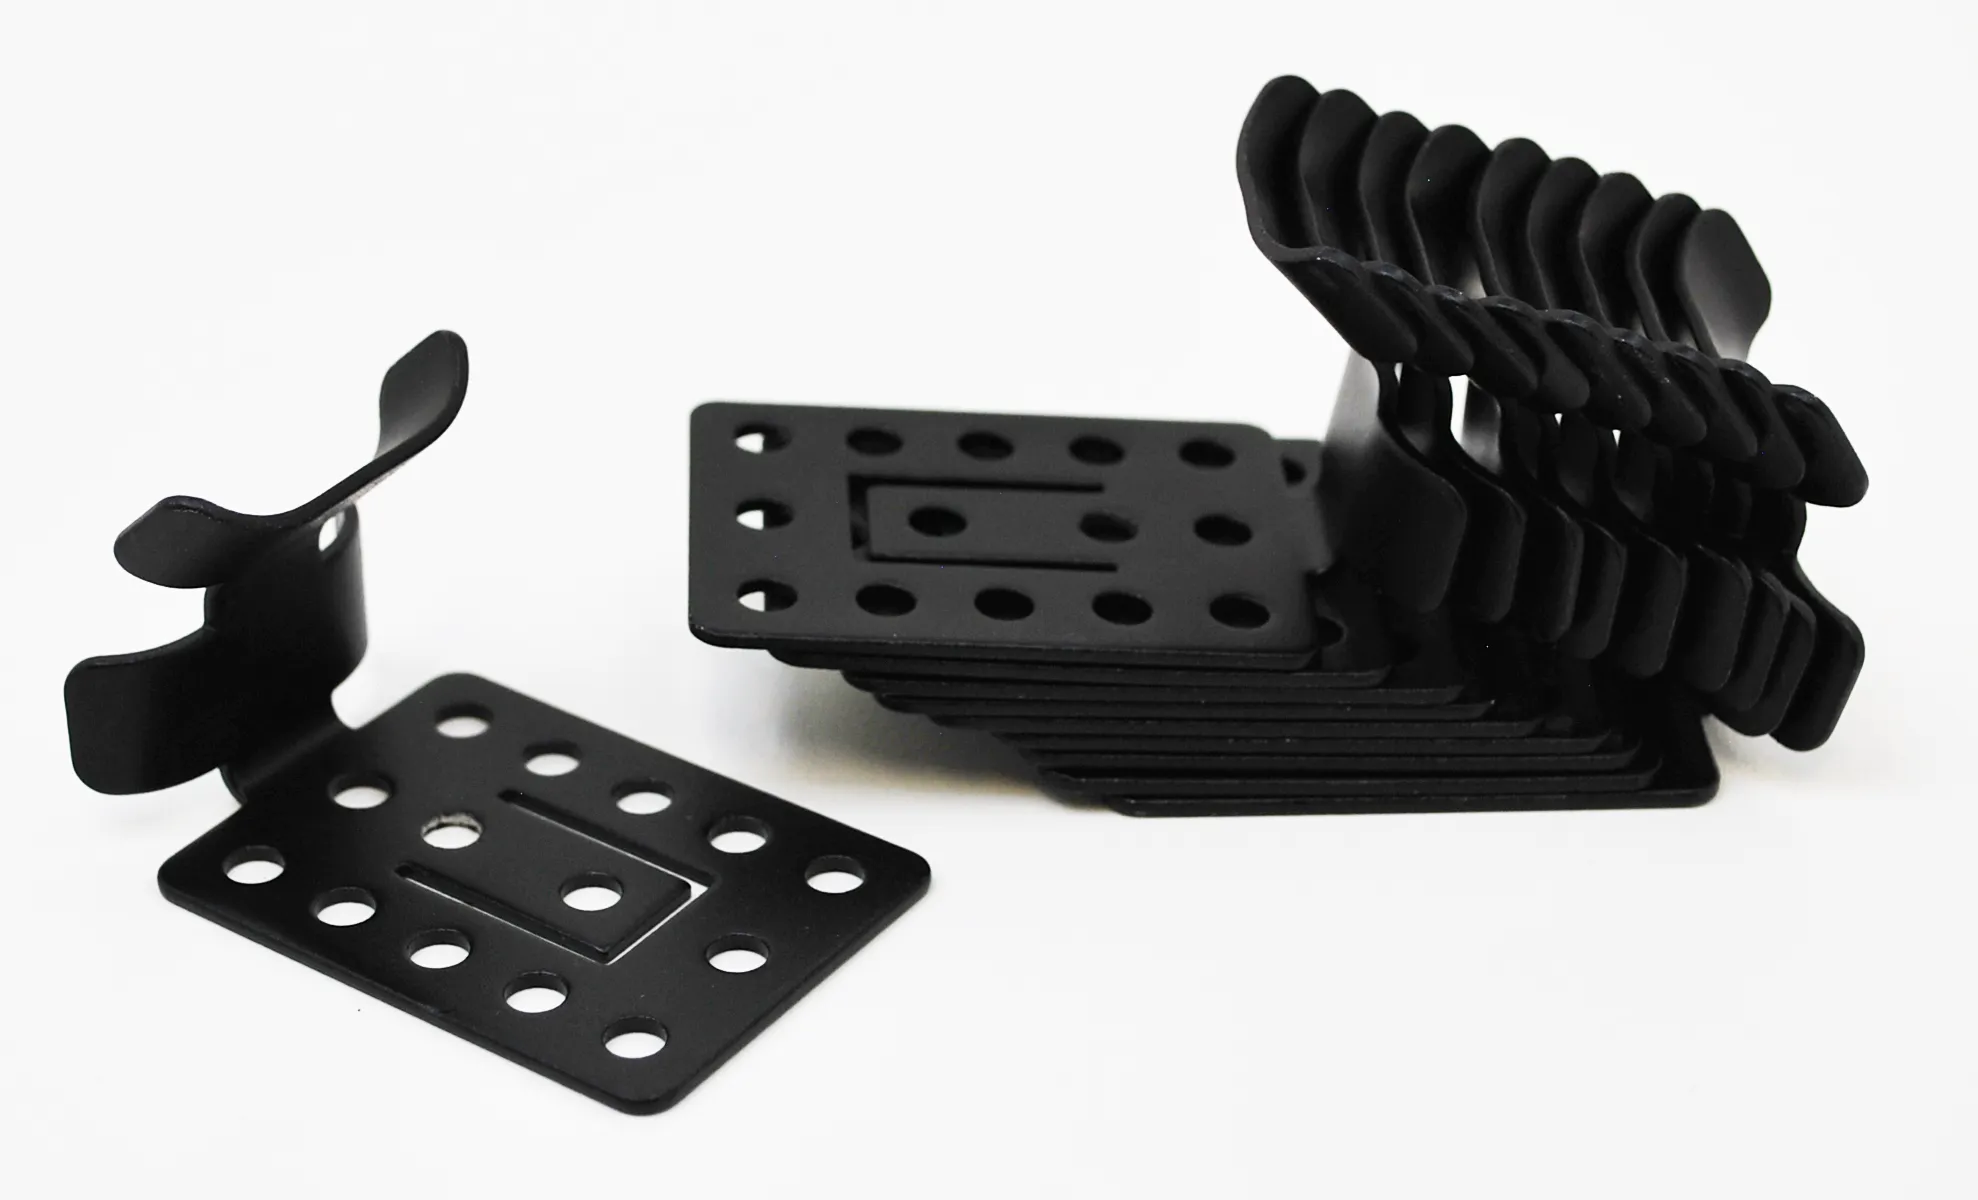
Roof Heat Cable Clips -10 Pack
Product Overview
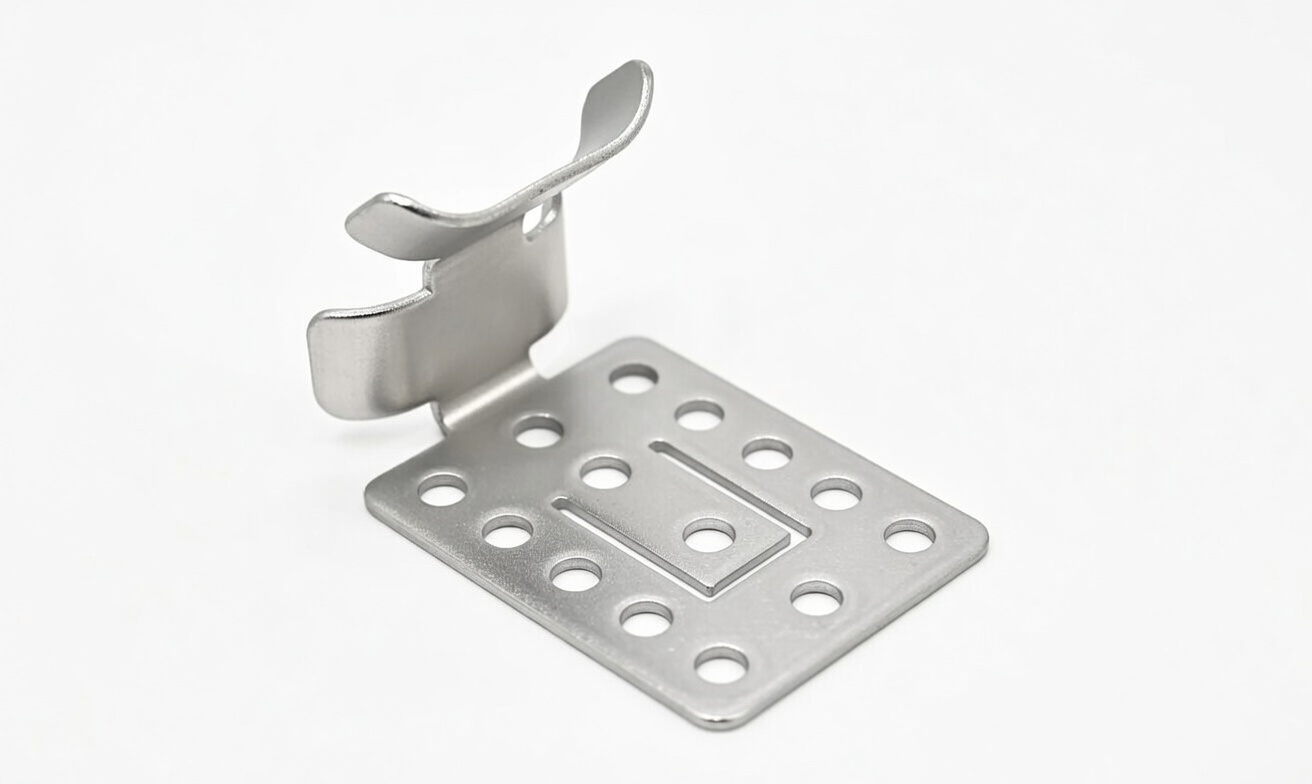
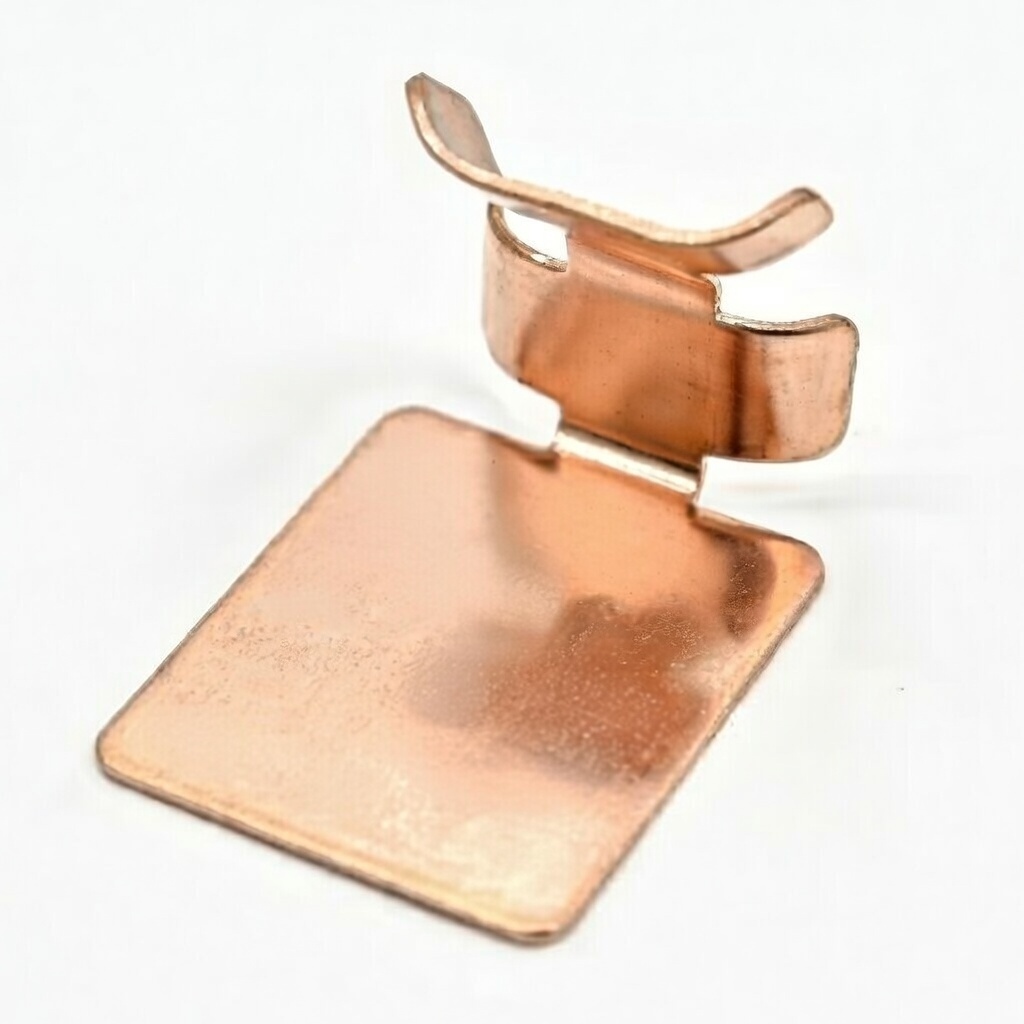
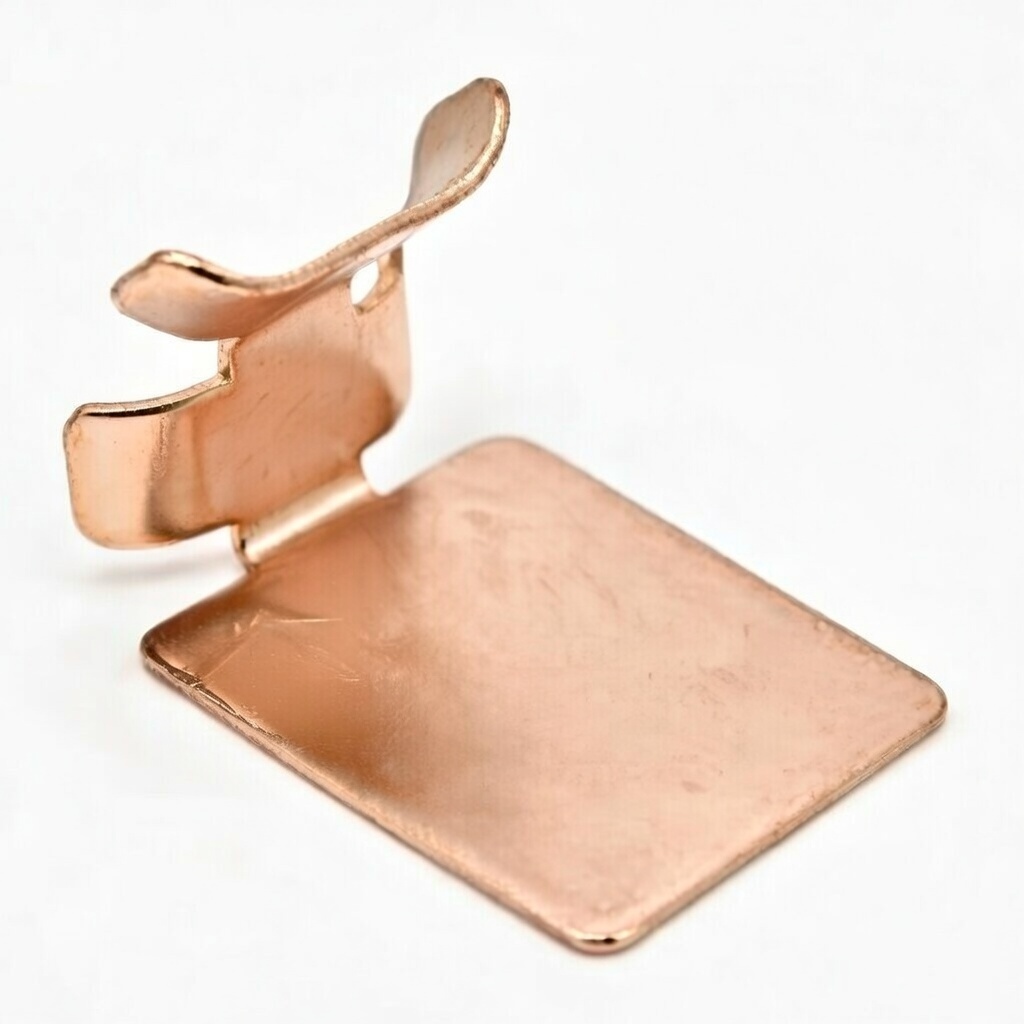
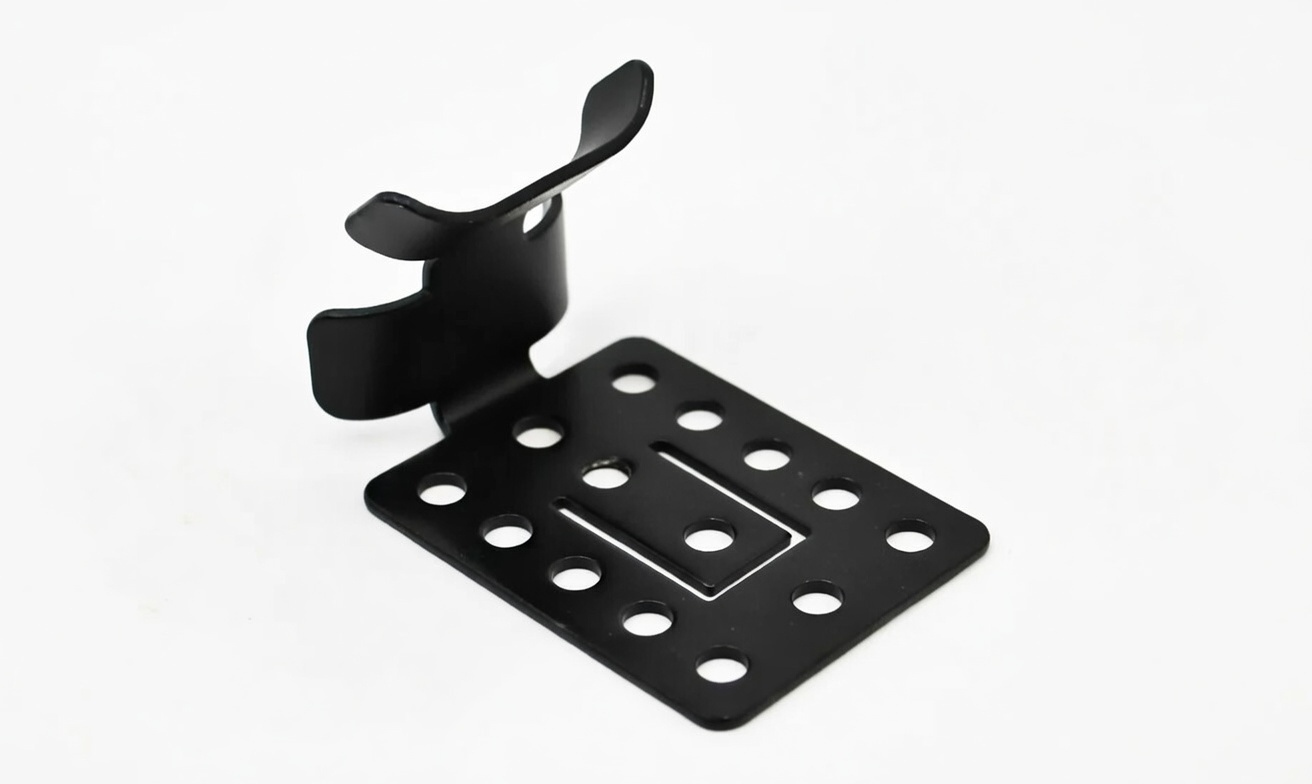
Roof heat cable clips are designed to securely fasten deicing cable to shingles and roofing surfaces for safe, effective installation. Don’t compromise your home’s defense system with unproven hardware. For over two decades, the Wasatch Heat Cable team has used these exact patented clips to secure millions of feet of cable without a single roof penetration.We’ve spent 20 years perfecting a leak-free installation method that preserves your roof’s integrity while providing industrial-strength protection against ice dams.
-
Zero Penetration, No Leaks: Eliminate the risk of water intrusion and voided warranties caused by traditional screws or nails.
-
Time-Tested Reliability: Twenty years of successful performance on shingle, metal, and membrane roofs in the harshest winter climates.
-
Patented “Grip” Design: Specifically engineered to grip self-regulating heat cable securely while maintaining a low-profile, professional aesthetic.
-
The Contractor’s Choice: A field-tested design that simplifies complex zigzag patterns, ensuring your ice prevention system stays exactly where it’s needed.
What’s Included:
🛠 Tools You Will Need:
This clip is only as good as the glue holding it. Make sure you have the right amount of adhesive:
-
M-1 Structural Adhesive: (Required) This clip is engineered to work specifically with Chemlink M-1. Do not use standard silicone or construction adhesive found at big-box stores.
-
Caulking Gun: A standard 10oz gun. Pro Tip: Use a high-thrust ratio gun if working in the cold; M-1 gets thick!
-
Stiff Wire or Nylon Brush: Essential for scrubbing granules and moss off asphalt shingles to get down to a solid surface.
-
Denatured Alcohol & Rags: If you need to clean the surface, use denatured alcohol and a rag.
-
Disposable Gloves: M-1 is extremely sticky and hard to wash off. Wear gloves and don’t get it on your clothes!
🔥 Pro-Tips from the Field
Achieving a “lifetime” bond is 90% preparation. Don’t just stick it—install it like a pro.
-
The “Hershey Kiss” Method: When applying the glue, do not smear it flat like paint. Apply a nickel-sized dollop (shaped like a Hershey Kiss) to the bottom of the clip. Press the clip down working the glue into the aggregate of the roof shingle and the glue pushes through the holes, but leave a layer of adhesive between the clip and the roof (about 1/16″ thick). This creates a flexible chemical anchor that expands and contracts with the temperature changes.
-
The “Drip Edge” Secret: The clip features a bendable center tab. When installing on the roof edge, bend this tab down so it sits flush against the vertical face of the drip edge. Applying glue to this second surface area doubles the holding power against lifting.
-
Watch the Temp: For best results, install when temps are above 40°F (4°C). If you must install in the freezing cold, keep your glue tubes in a warm bucket or inside your truck until the exact moment you use them.
⚠️ CRITICAL WARNINGS
Failure to follow these rules will result in clips falling off the roof.
-
NO SILICONE: Never use silicone caulk. Silicone is a gasket, not a structural adhesive. It will peel off after one or two winters, taking your heat cable with it. You must use a structural polyether adhesive (like M-1).
-
NO ICE OR FROST:While M-1 is amazing and can be applied to wet surfaces, it cannot bond to ice or frost. If the roof is icy, you must clear it and dry it enough to ensure you are gluing to the shingle, not a layer of frozen water.
-
DO NOT TENSION IMMEDIATELY: M-1 Adhesive skins over quickly (20 minutes), but structural curing takes much longer. Do not tension the cable immediately after gluing.
-
SAFETY FIRST: You are working on a roof, likely in cold weather. Always use proper fall protection and secure your ladder. No ice dam is worth an injury.
Need to Design a Complex System?
Don’t guess. If you have a complicated roof with multiple branches, send us a sketch! The team at HeatCable.com can help you calculate the cable lengths, electrical loads, layouts, and clip quantities for your project.
Our Guarantee:
We don’t sell unproven parts. We’ve spent 20 years perfecting a leak-free installation method, and these clips are the backbone of that success.
Frequently Asked Questions
Do I really need to clean the roof first? Absolutely. For the adhesive to maintain the roof’s integrity and provide a permanent bond, it needs to stick to the roof material, not the dust or loose granules on top of it. A quick brush of the area is the most important step for a “no-leak” guarantee.
Will the adhesive damage my shingles or metal roof? No. The M1 adhesive we provide is chemically neutral and specifically designed for roofing applications. It bonds to the surface without eating into the material, preserving the life of your roof.
How many clips do I need for a standard zigzag pattern? Most standard “over-the-eave” zigzag patterns use about one clip per foot of roof edge. This 40-clip bundle is designed to cover approximately 35–40 linear feet of gutter line, depending on the depth of your zigzags.
What happens if I need to remove a clip later? Because the system is non-penetrating, you won’t be left with holes. Clips can be carefully pried up with a putty knife, and any remaining cured adhesive can be trimmed away without compromising the roof surface.
Can I install these while it’s snowing? For the strongest bond, we recommend a dry surface. If you must install in damp conditions, wipe the area as dry as possible. The M1 adhesive is a moisture-cure product, but it performs best when applied to a clean, prepared surface.
NEED HELP WITH LAYOUT?
Check out our “Diagrams & Layouts” page or watch Eric’s latest tutorial to see exactly how to space your clips and apply M-1 glue for a leak-free install. – Coming Soon!